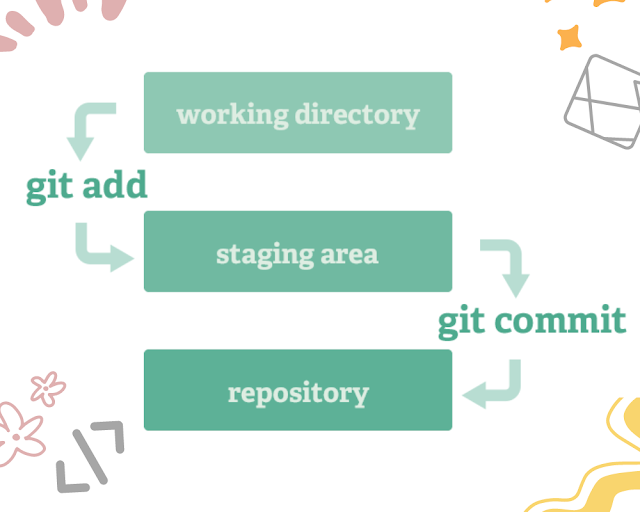
Understanding Git Staging
Before committing changes to your repository, it's essential to stage them. Staging involves selecting the specific changes you want to include in your next commit, providing control over which modifications are grouped together. This selective process is crucial for maintaining a clean and organized commit history.
Using `git add` Command
The `git add` command plays a pivotal role in adding files or changes to the staging area. Here are common scenarios for utilizing `git add`:
- Stage a Specific File:
git add filename.txtgit add file1.txt file2.txtgit add .git add -pExample: Staging a File in Git
Consider a scenario where you have modified a file named
index.html. To stage the changes, you would execute:
git add index.htmlTo verify which files are staged, use:
git statusThis command provides a detailed overview of your working directory and staging area, highlighting the files that are ready for the next commit.
Committing Changes
After staging your changes, the next step is to commit them. A commit in Git represents a snapshot of your project at a specific point in time. Each commit is uniquely identified by a hash, and it includes metadata such as the author, date, and a descriptive message explaining the changes.
Utilizing `git commit` Command
The `git commit` command is central to saving your changes in the repository. Below are common use cases for `git commit`:
- Commit with a Message:
git commit -m "Descriptive commit message"git commit --amendgit commit -a -m "Commit message for all changes"Example: Committing Changes in Git
After staging index.html, commit the changes with a meaningful
message:
git commit -m "Refactor homepage layout in index.html"This command creates a new commit, adding it to the repository’s history.
Reviewing Commit History
The `git log` command is an essential tool for reviewing the commit history of your repository. It provides a detailed account of each commit, including the commit hash, author, date, and message.
Using `git log` Command
The `git log` command offers several options to customize the output:
- Basic Log Output:
git loggit log -n 5git log --onelinegit log -pExample: Viewing the Git Commit History
To view the history of your repository, simply execute:
git logFor a more compact view, you can use:
git log --onelineThis condensed format is particularly useful for quickly scanning through recent commits.


Post a Comment